
Tonic Punches - pack a punch with borders.
7:30:00 AM
Border punches are such a versatile item for any
crafter – whether you make cards, scrapbook or dabble in the possibilities of
interior design items and crafts. Tonic punches are special punches – they are
strong and versatile and available in a huge range of designs. Today I am
sharing some ideas of what I did with my range of Tonic punches …
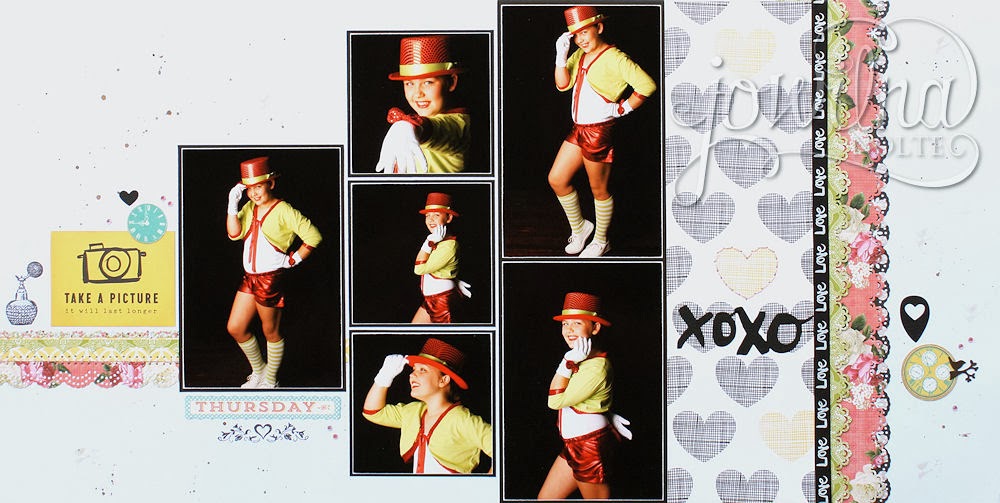
I used my punches to create subtle effects on a
double page layout. I combined two different border punches to create a visual
feast on my patterned papers and add interest to what would otherwise have been
a bland straight border. I also used some of the beautiful Chiswick clear stamps to add images to my background which worked perfectly with my theme.

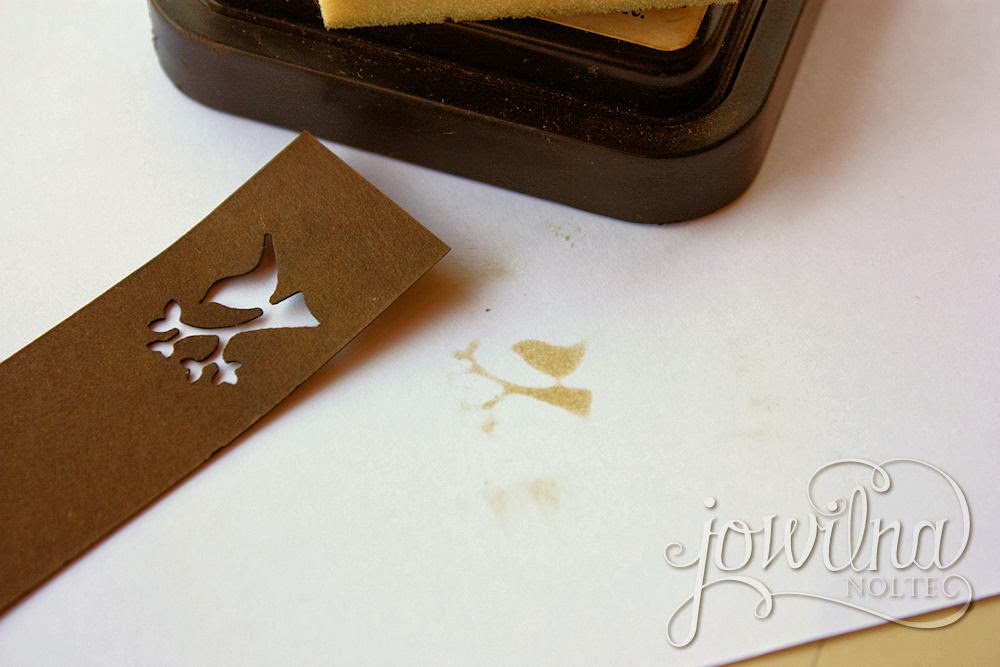
On my background I used a little birdie punch and punched the image out of plain cardstock. I then used ink and a sponge tool to ink through the punched image – the image acts as a stencil that can be used randomly on my background. It makes for a nice delicate effect without distracting you from what is really important on your layout.

I love how you can use the border designs on
patterned papers and the designs don’t interfere with each other. I used two
different punches on two different patterned papers and then layered them on
top of each other for a dimensional visual effect.

Here you can see how I used all the bits and
pieces from my punched borders on my layout. After I punched the borders, I
kept the remainder of the punched strips which looks more like upside down
waves – the lime green part. I also kept the tiny little dots from the border
punch and adhered them to my layout using super tape.

Step 1 - I used a thin strip of off-cut cardstock to
punch my little birdie.

Step 2 - Use a light brown ink and sponge dauber to ink
through the tiny stencil to reveal your image. Move the stencil over the
background randomly and keep inking to create the background.
How to use your Tonic Punches
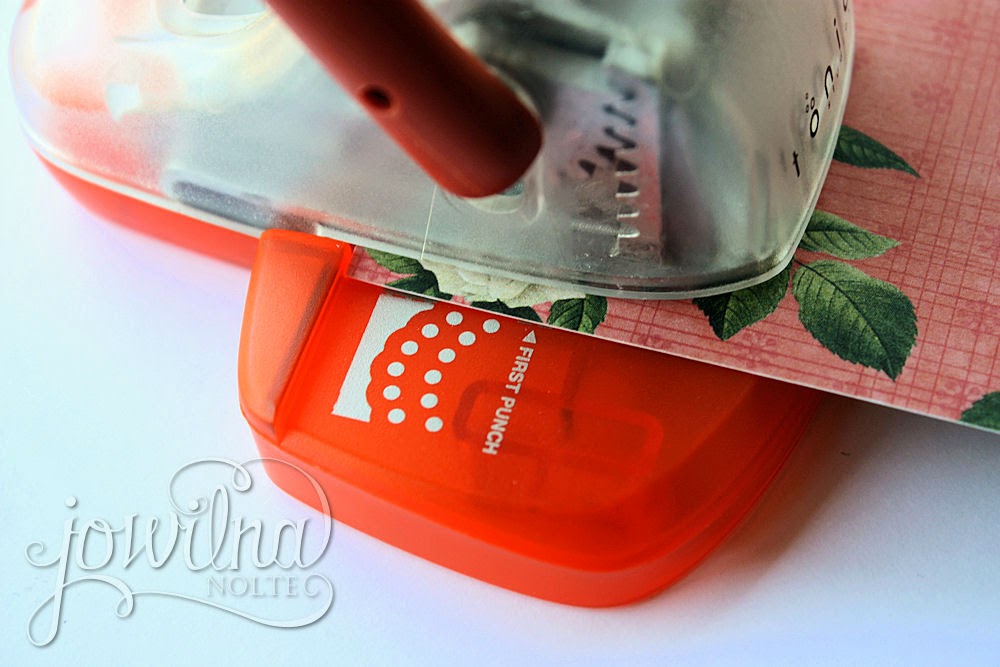
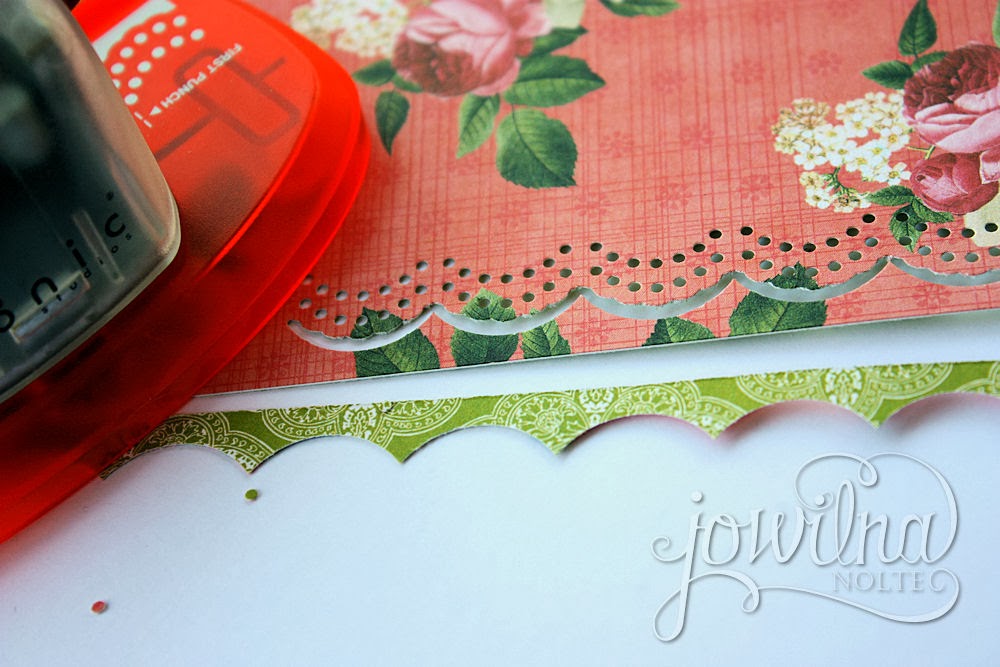
Step 1 - The punches clearly indicate where to start your border punch. Line up the edge of your paper with the dotted line marked first punch. Press down the lever at the top to make the first punch.
Step 1 - The punches clearly indicate where to start your border punch. Line up the edge of your paper with the dotted line marked first punch. Press down the lever at the top to make the first punch.
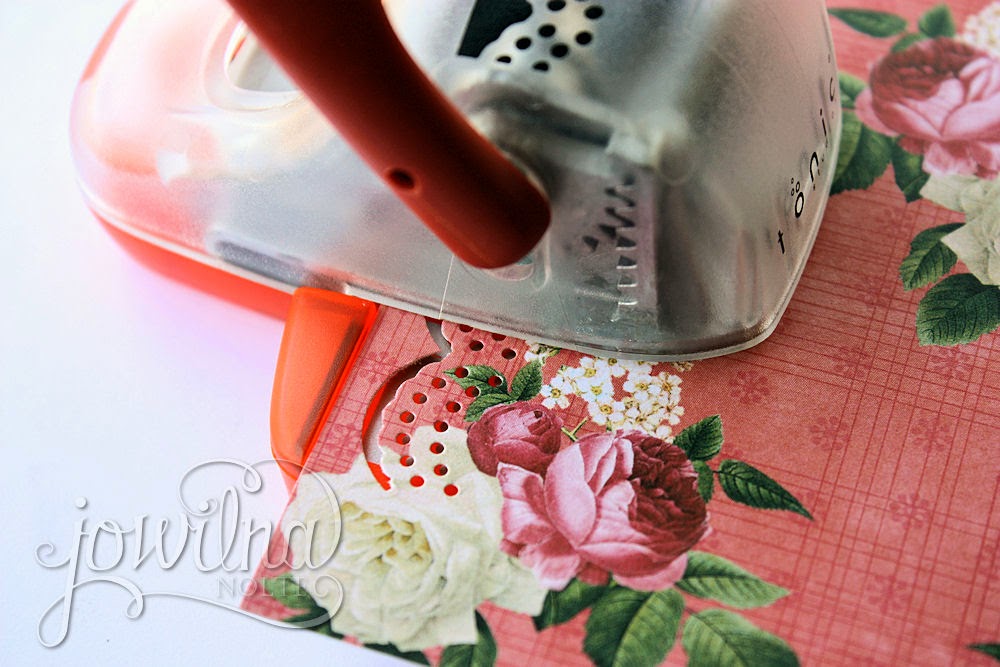
Step 2 - With this step you only move the punched image
on ‘halfway’ – so that you can only see a small bit of the punched image. You
can clearly see that my first punched image is line up with the printed silver
image on the base of the punch

Step 3 - Then you keep on punching and moving the image
half a punch up and continue punching until your entire border strip is
complete. You will then have to go back and punch the very first part of your
strip by moving it through the punch from the opposite side and lining it up to
complete the entire strip.
Step 4 - Once you are done punching the bottom part of
your strip will fall off and you can keep this part as I have done to add another
dimension to your art work by using it as another border.

Step 5 - To open up the punch simply pull up the cover at
the back that catches all the little bits and pieces and remove them.

Step 6 - I used the dots and adhered them to my layout
using super tape. Add a strip of tape where you want your dots to be adhered.
Sprinkle the dots onto the tape and press down firmly with your fingers to make
them stick. Remove the excess dots or whatever has not adhered to the tape. If
you have any open bits you can sprinkle Chiswick glitter over the tape and
shake off the excess. The glitter will adhere to the tape and add another
dimension to your project (watch for a step x step tutorial in our next article).

Step 7 - By using double sided patterned paper I could
simply turn over the remainder from my border strip and use it to introduce an
accent colour to my layout. A fun and easy way to use up all those beautiful scrap
papers we keep on hoarding.
Tips
and hints
By clipping your punches closed you can store them in a drawer or box without taking up too much space
By clipping your punches closed you can store them in a drawer or box without taking up too much space
Punch through wax paper and tin foil to sharpen
your punches again – it is that easy and works really well
Remember that punches really aren’t made for
thick cardstock and by punching through certain materials you could jam and
essentially damage your punches for good
Always clean your punches regularly by removing
pieces of off-cuts from the catch area – this will also avoid it getting
clogged and accidentally open and making a big mess
The ingenious (patented) gearing mechanism takes all the effort out of punching from the user meaning even the most ornate shape can be punches effortlessly
The ingenious (patented) gearing mechanism takes all the effort out of punching from the user meaning even the most ornate shape can be punches effortlessly


2 comments